How can we help?
Contact page and contact form
Select the Page form from the menu bar to edit.
The Form Page forms the basic structure of the contact form. The form configuration is integrated into the form page.
Contact Page (Form Page)
Via Add Form Page First select “Default Contact Form”.
Create the Form Page as follows:
- MetaName: Here you assign a technical name, for example “contact form”. This means that the contact form can later be selected for the results page and email delivery.
- Url Endpoint: In order for the page to be accessed, you must provide a URL endpoint name (example: “contact form”).
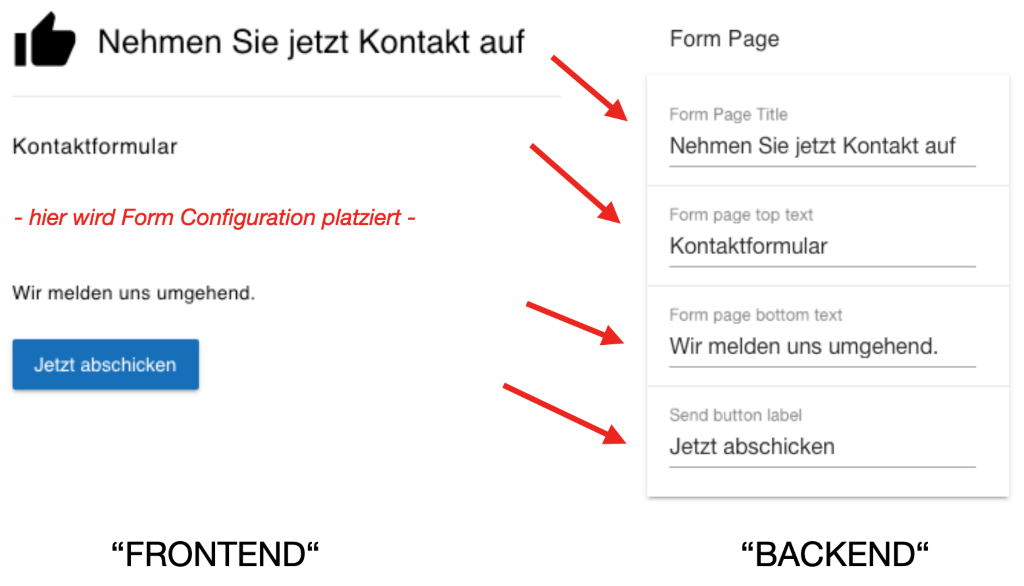
- Form Page Title: Enter a title for the contact form. This is displayed to the user on the page.
- Send button label: Text displayed on the form submit button.
- Form page top/bottom text: Here you create text elements that are displayed above and below the contact form (see screenshot).
Contact form (Form Configuration)
In the Configuration form you can query the contact details of your potential customers. You have several design options for this.
To query the first name, last name and email address, use a text input field into which the customer later enters their data.
To do this, choose Add Form Field and the field type Text Field.

Click on the right Text Field and fill out the following fields:
- Input name: This is a technical name. You can leave this field blank to enter your first and last name. For the email address, however, it is important that “email” is entered here! This is the only way to ensure that email sending works later. Please pay attention to the lowercase letters in the example.
- Input label: The name stored here is visible to the user in the contact form. For example, in the field intended for the email address, the user subsequently sees the text “eMail” and therefore knows that they have to enter their email address. You don't have to pay attention to upper or lower case because it is a label and not a technical name.
You can leave the remaining fields blank. Create a total of three text fields: one each for first name, last name and email address.
The contact form then looks like this:
Front end – back end:

Then choose below Add Form Field use the option Drop down and set these fields as Input label, so you can query the country of origin:
Front end – back end:

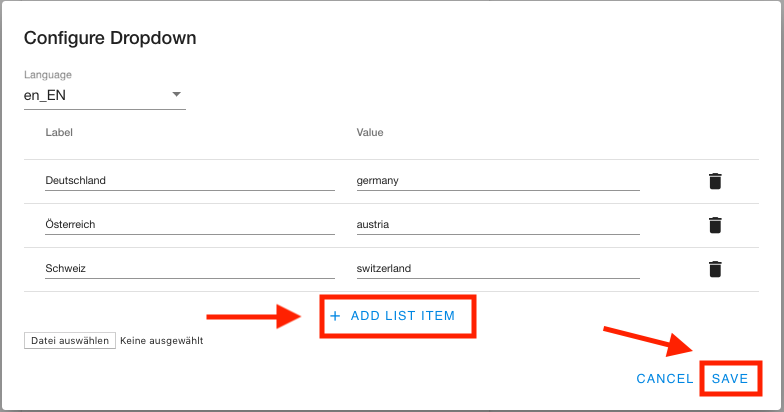
In the Value list You can configure the selection options in the Configuration form. To do this, choose Configure.

Click in the new window Configure dropdown the button + ADD LIST ITEM and add three countries to choose from. Save the entries as SAVE.
Last but not least, ask whether the customer is over 18 years old. To do this, use the Checkbox.
To do this, choose Add Form Field and the option Checkbox. Set this field as Input label.
Front end – back end:
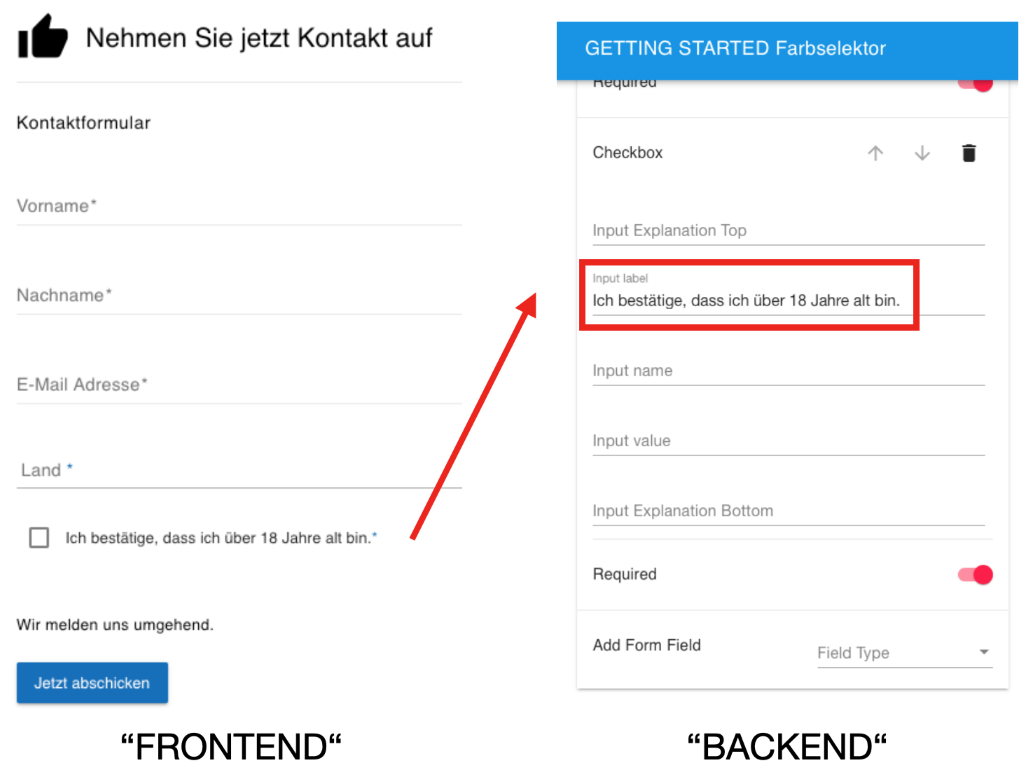
Since all Information required are, turn on the switch in all sections Required on (switch appears red).

So that the user of the selector can receive his personal result by email, under Menu: Lead > NEW MAIL CONFIG an email form can be created. The email will be automatically sent to the selector user's contact details if it has been created correctly. A PDF document containing the recommendations and answers can be attached to the email. Here is an example of such a PDF template (File with Right click > Save As store locally and then with LibreOffice open and edit):
Download template example (.fodt file)
A notice: Downloading and configuring the PDF document is not relevant to creating your selector.
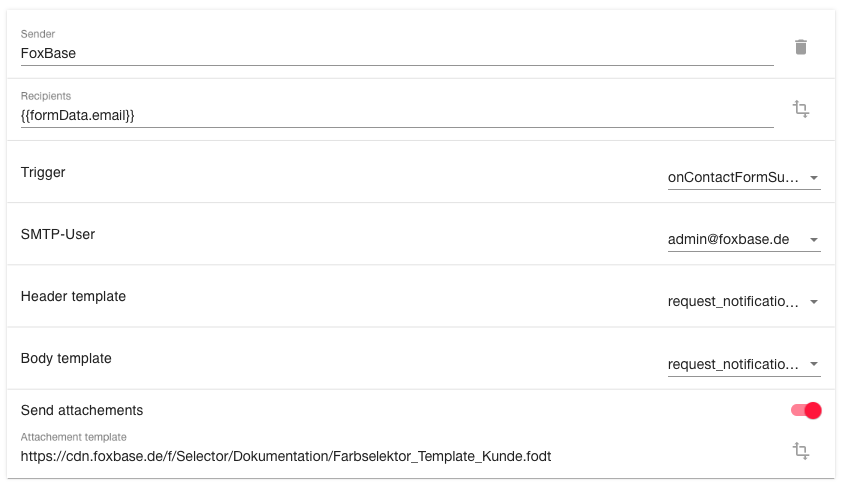
The input looks like this:
- Channel: Sender of the email, which will be displayed in the inbox when the message is received.
- Recipients: Here you set who should receive the email. You remember: When configuring the text field for the email address, you had to enter the input name “email”. Now configure the input under Recipients {{formData.email}}that the message will be sent to the same address stored in the contact form. For this reason, care must be taken to ensure that the spellings in both fields are exactly the same.
- Triggers: Select the contact form you created.
- SMTP user: Currently only admin@foxbase.de can be selected here. This determines which server the email will be sent from. Setting this field is therefore absolutely necessary.
- header template: Here you specify which template will be used for the email subject. Please use “request_notification_mail_subject”.
- body template: Here you specify which template will be used for the email text. Please use “request_notification_mail_body”.
- Send attachments: This controls which PDF template is attached to the email attachment. You don't need this function for your test selector.
You can find more information about lead management in the Digitizer documentation (no longer relevant for creating your test selector):
Resources: Lead
Resources: Data Sources
Resources: Contact form (more)


