How can we help?
General settings and staging environment
The general representation of the selector in the front end, as the user will see it later, is controlled via the button Settings defined in the menu.
You can edit the general properties of the selector there:
- Switch between the staging and live environments
- Publish the current work status to the live environment
- Add Google Analytics Tracking ID and Google Tag Manager ID
- style and color
- Button Labels
What is the staging environment and how does it work?
Changes to the selector are not reflected directly in the live environment made, but in the Test environment (staging).
In the digitizer there is the possibility to prepare and save all changes before they are finally to be transferred to the live system.
This allows customizations to be tested first while the live selector is still visible to customers on the website.

By loading the video, you agree to YouTube's privacy policy.
learn more
Here is an overview of the most important functionalities:
- live switch: To edit the selector, the live button in the top left corner must be switched off. No changes can be made in the live environment.

- Live and staging run parallel: As a user, you can see both the original settings in the digitizer (live switch on) and the current status of changes in the staging environment (live switch off).
- Saving changes to staging: Changes must still be saved regularly and are visible to all registered users in the digitizer. The last status of the changes remains until either the original status has been restored with "Reset" or the changes have been transferred to the live system via "Publish" and thus visible to the customer.
- Internal testing: The selector URL of the staging environment is different from that of the live environment and can therefore also be sent for internal discussions and test rounds.
- Transfer Changes: In order to transfer the changes to the live selector, you must finally click on "Publish". The changes are then visible to everyone and updated in the frontend, integrated on the website.
- Important NOTE: After creating a new selector, it should be published immediately so that a live version is created in the system.

Other general settings
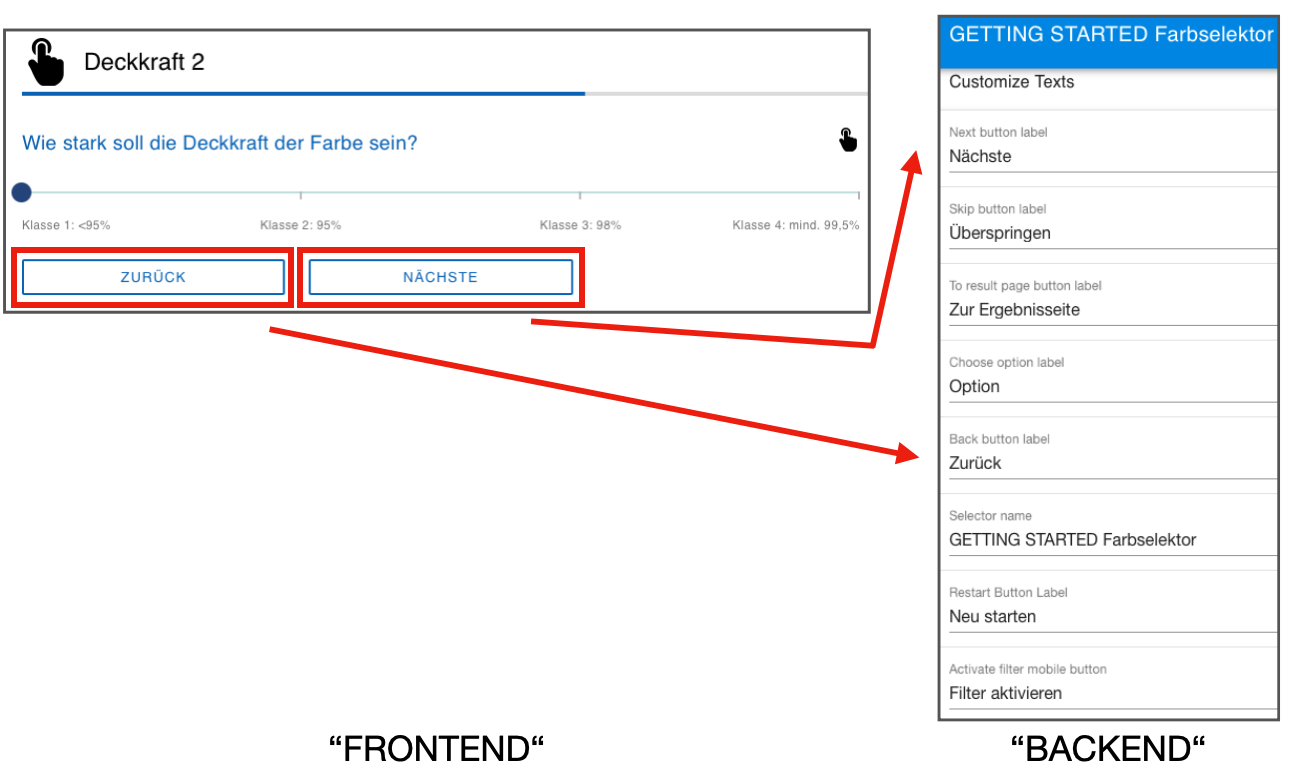
In the Customize text you can now define the button names.
Front end – back end:
You can also decide whether you want to give your users the option to Restart button on every page or only on the Results Page. If the button is displayed on every page, users can cancel and restart the questionnaire at any time. To enable this, you must go to Settings < Questionnaire Settings < Show restart button on questionnaire page activate the controller. This appears blue when activated.
Resources: other general settings


